Multi-Column List Box Conditional Formatting
Conditional formatting can be used to add emphasis or context to the text or cells within a list box or multi-column list box. When applied, the color and font style can be modified based on the conditions set by the user. This can be useful when trying to draw comparisons to data, emphasize points of interest within a column, or simply drawing attention or making certain data easier to locate.
Some common examples may include setting negative numbers to appear as red, or highlighting certain cells in green, yellow, or red to indicate good, average, and poor conditions.
The example below demonstrates how to set conditional formatting so that any value in the state column that equals "CA" will appear as bold within a yellow cell, while any cell with an empty value appears as red.
Editing the Columns
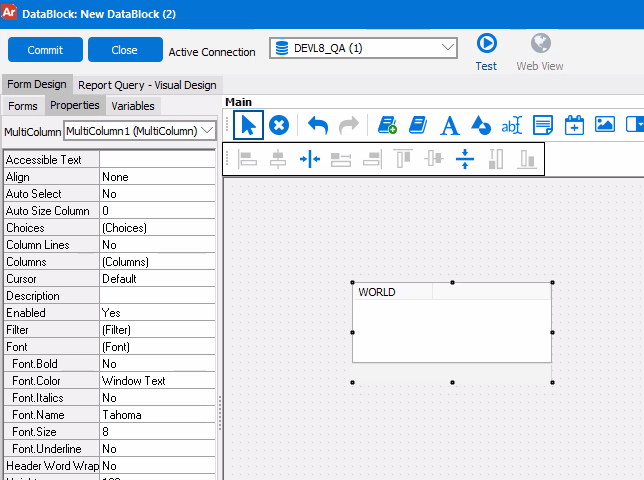
The first step is to create a DataBlock and launch the DataBlock Designer, then create a multi-column list box object.
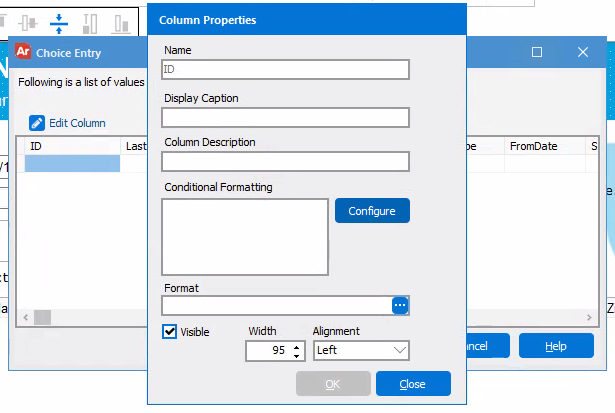
To add conditional formatting while modifying a SQL query, navigate to the Choice Entry dialog. For more information on designing variables in the Choice Entry dialog, see Selecting a Variable Type.
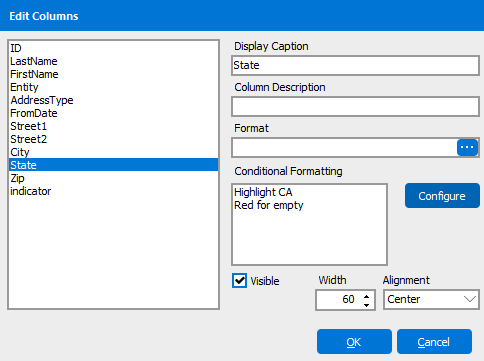
Next, select the Edit Columns button. From the Column Properties window, select Configure to open the Configure Conditional Formatting dialog.

Conditional formatting can also be applied after a SQL query has been modified as well. From the DataBlock Designer window, navigate to the Properties tab.

You can either right-click on the multi-column list box object and select "Edit Columns", or locate Columns from the Properties tree and select the eclipses to open the Edit Columns dialog.

Select the Configure button to open the Configure Conditional Formatting dialog.

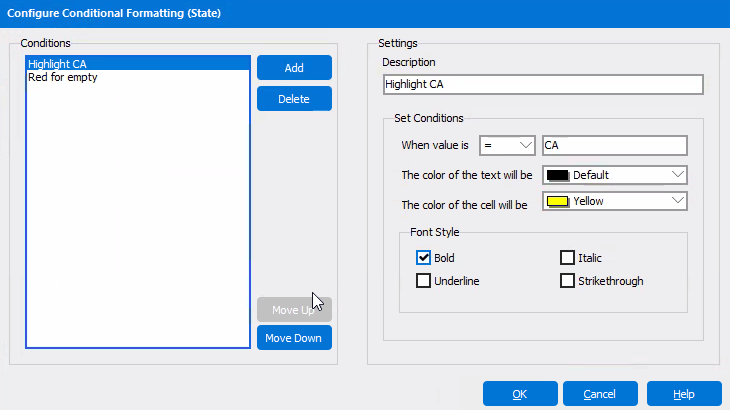
The Configure Conditional Formatting dialog is where users will add their conditions, and set the criteria for their text and cell formatting choices.
- Add - This allows you to add a condition for formatting.
- Delete - This allows you to delete a condition from the Conditions field.
- Move Up / Move Down - These buttons allow for the order of the conditions to be moved up or down the list.
- Description - A description of the formatting being performed for the currently selected condition.
- When value is - This sets the operator upon which the condition will act.
- The color of the text will be - This sets the color of any text that meets the indicated condition.
- The color of the cell will be - This sets the highlight color of any cell that meets the indicated condition.
- Font Style - These indicate the additional style effects that can be placed upon the text.
For this example, "Highlight CA" and "Red for empty" have been added to the Conditions list.

Under the Settings field we see that the following has been selected as the desired formatting:
- A description has been added to the Highlight CA condition.
- The "=" operator has been selected. This indicates that the conditional formatting should apply to any cell with a value that equals "CA".
- Any text that meets the above criteria should remain in default color.
- Any cell that meets the above criteria should be shaded with yellow.
- Any text that meets the above criteria should appear with a bold font.
Do the same for any other conditions that have been added to the Conditions list. For this example, we see the second condition highlights any cell in red if it does not have a present value.
When finished select "OK".
It's important to note that the order of the conditions on the Conditions list controls the order in which the desired formatting will be performed. The condition at the top of the list will always be performed first, while subsequent conditions will be performed in list order. This means that the formatting for one condition may overwrite the formatting of a previous condition, so conditions should be ordered appropriately.
For example, if the condition at the top of the list is formatted to change all text values greater than 100 to red, and the second condition on the list is formatted to change all text values greater than 50 to blue, the formatting of the first condition will be overwritten. The end result is that any text values greater than 50 will be blue.
Now that conditional formatting has been applied, run the DataBlock to see the conditional formatting.

The State column highlights all values that equal "CA" as yellow and bold, while empty cells appear as red.